10 Christmas Decorating Ideas On A Budget

10 Christmas Decorating Ideas On A Budget for Sunshine State Celebrations 🌴🎄
Ahoy there, fellow Floridians! As we gear up for the holiday season under the palm trees and sunshine, it’s time to bring a touch of Christmas cheer to our homes without breaking the bank. Join me as we explore 10 fantastic Christmas decorating ideas that won’t burn a hole in your pocket.
1. Christmas Garlands Ideas

Let’s kick off our festive journey with some fabulous Christmas garlands. Here in the Sunshine State, consider incorporating elements from our beautiful surroundings. Pinecones, seashells, and even mini surfboards can add a coastal twist to your garlands.
Here’s a simple DIY Christmas garland tutorial to get you started. This garland will be made using natural materials, but you can always customize it with your favorite colors and decorations.
Materials:
- Greenery: You can use real or artificial greenery. Pine branches, cedar, or eucalyptus work well for a natural look. If you prefer artificial, you can find faux greenery at craft stores.
- Twine or String: To create the base of your garland.
- Decorative Elements: This can include ornaments, pinecones, berries, ribbon, or any other decorations you like.
- Scissors and Wire Cutters: For cutting and shaping the materials.
Instructions:
- Prepare the Greenery:
- If you’re using real greenery, trim the branches into smaller, manageable pieces.
- If you’re using artificial greenery, fluff and shape it to your liking.
- Create the Base:
- Cut a length of twine or string to your desired garland length. This will depend on where you plan to hang it.
- Attach the Greenery:
- Lay the greenery along the twine, securing it with small pieces of wire or by tying it with twine.
- Overlap the branches to create a full and cohesive look.
- Add Decorative Elements:
- Intersperse the greenery with your chosen decorative elements. Attach them securely using wire or by tying them onto the twine.
- Create a Pattern:
- To make your garland visually appealing, create a pattern with your decorations. For example, you could alternate between pinecones, ornaments, and bows.
- Hang and Adjust:
- Once you’ve reached your desired length and added all your decorations, hang the garland where you want it.
- Adjust the position of the greenery and decorations to ensure an even and balanced look.
- Securely Hang:
- Use hooks, nails, or other secure methods to hang your garland.
- Optional Lighting:
- If you want to add lights, consider stringing battery-powered LED lights along the garland for a festive glow.
Feel free to get creative and personalize your garland to match your holiday decor. You can experiment with different colors, textures, and styles to make it uniquely yours. Enjoy your DIY Christmas garland!
2. DIY Christmas Tree Ideas
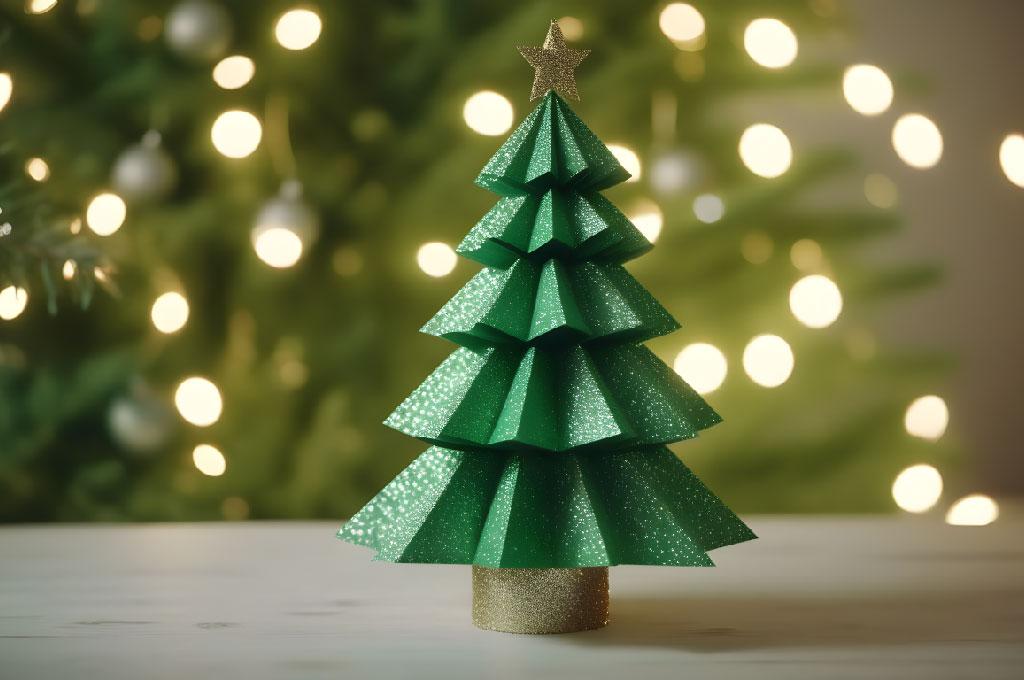
Why spend a fortune on a Christmas tree when you can create your own? Head to a local tree farm or even your backyard, and gather some branches. Arrange them in a vase or pot, and voila! You’ve got yourself a rustic and budget-friendly Christmas tree.
Creating a DIY Christmas tree can be a fun and budget-friendly project. Here’s a simple way to make a tabletop or wall-hanging Christmas tree using basic materials:
Materials:
- Large Sheet of Green Poster Board or Foam Board
- Scissors
- Pencil
- Decorative Elements: Ornaments, stickers, glitter, ribbon, or any other decorations you like.
- Glue or Double-Sided Tape
- Small Piece of Cardboard (optional, for the base if making a tabletop tree)
Instructions:
- Draw and Cut the Tree:
- On the green poster board or foam board, draw the outline of a Christmas tree. You can do a simple triangular shape.
- Cut along the outline using scissors.
- Decorate the Tree:
- Use ornaments, stickers, glitter, or any decorations you prefer to embellish your tree.
- Get creative! You can create patterns or keep it simple — it’s entirely up to you.
- Create a Trunk (if making a tabletop tree):
- Cut a small rectangle or square from the cardboard.
- Attach the bottom of the tree to the cardboard using glue or double-sided tape to create a stable base.
- Add a Topper (optional):
- Create a star or use a small ornament as a tree topper. Attach it to the top of your tree.
- Hang or Display:
- If you want a wall-hanging tree, you can attach a loop of string or ribbon to the back of the tree and hang it on a hook or nail.
- If you made a tabletop tree, find a suitable spot to display it.
- Personalize Further (optional):
- Consider personalizing your tree with small photos, messages, or other items that are meaningful to you and your family.
- Enjoy Your DIY Christmas Tree:
- Admire your handiwork and enjoy your unique, homemade Christmas tree!
This DIY Christmas tree is quick, easy, and can be a great project to involve the whole family. Feel free to adjust the size and decorations based on your preferences. Happy crafting!
3. Tree Topper Ideas

Who needs an expensive tree topper when you can get creative? Craft a unique topper using items like ribbons, bows, or even a stylish Santa hat. Let your imagination run wild and give your tree a personal touch.
Making your own DIY Christmas tree topper is a creative and enjoyable project. Here’s a simple guide to creating a star tree topper:
Materials:
- Cardboard or Thick Paper
- Gold or Silver Wrapping Paper or Metallic Paint
- Scissors
- Pencil
- Ruler
- Craft Glue or Tape
- String or Wire (for attaching the topper to the tree)
Instructions:
- Draw the Star:
- Draw a large star shape on the cardboard or thick paper. You can use a stencil or freehand it. Ensure it’s proportionate to the size of your Christmas tree.
- Cut Out the Star:
- Carefully cut along the outline of the star using scissors.
- Cover with Wrapping Paper or Paint:
- If using wrapping paper, cover the cardboard star with gold or silver wrapping paper. Glue or tape it in place.
- If using paint, apply a layer of metallic gold or silver paint. Allow it to dry completely.
- Add Details (optional):
- For an extra touch, you can add details like glitter, sequins, or gemstones. Get creative with embellishments to make your star shine.
- Attach a String or Wire:
- Turn the star over and attach a loop of string or wire to the back. This will be used to secure the topper to the tree.
- Let it Dry (if using paint):
- If you painted the star, make sure it’s fully dry before placing it on the tree.
- Secure to the Tree:
- Attach the string or wire loop to the top of your Christmas tree. Ensure it’s securely fastened so that the topper stays in place.
- Admire Your DIY Tree Topper:
- Step back and enjoy your handmade tree topper!
Feel free to customize the size, shape, and color of your tree topper to match your Christmas decor. You can also experiment with different materials or add personal touches to make it uniquely yours. Happy crafting!
4. Christmas Stockings

Don’t overlook the charm of handmade stockings. Raid your fabric stash or repurpose old sweaters to create stockings that scream “Florida festive.” Add some seashell embellishments or palm tree appliqués for that extra flair.
Making your own DIY Christmas stocking is a delightful and personalized way to add a special touch to your holiday decor. Here’s a simple guide to creating a basic Christmas stocking:
Materials:
- Fabric: Choose a festive fabric for the body of the stocking. You can use felt, fleece, cotton, or any fabric that suits your style.
- Lining Fabric: A contrasting or complementary fabric for the stocking lining.
- Scissors
- Paper for Template
- Pencil or Fabric Marker
- Sewing Machine or Needle and Thread
- Ribbon or Fabric for Hanging Loop
- Decorations: Optional embellishments like buttons, sequins, or appliqué.
Instructions:
- Create a Template:
- Draw a stocking shape on a piece of paper. You can find templates online or create your own by drawing half of a stocking along the fold of the paper.
- Cut Out Fabric:
- Place the template on the fabric and cut out two stocking shapes. Repeat the process for the lining fabric.
- Pin and Sew:
- Place the right sides of the outer fabric together and pin the edges. Do the same for the lining fabric.
- Sew around the edges, leaving the top open. If you’re hand-sewing, use a running stitch or blanket stitch.
- Clip Curves and Turn Inside Out:
- Clip small notches along the curved edges (be careful not to cut the stitching).
- Turn both the outer fabric and lining inside out, so the right sides are facing outward.
- Insert Lining:
- Place the lining inside the outer fabric, aligning the top edges.
- Sew the Top Edge:
- Sew around the top edge to join the outer fabric and lining. Leave a small opening for turning.
- Turn Right Side Out:
- Through the opening, carefully turn the stocking right side out.
- Close the Opening:
- Hand-sew or machine-stitch the opening closed.
- Create a Hanging Loop:
- Cut a piece of ribbon or fabric to your desired length and create a loop. Attach it to the inside of the stocking at the back seam.
- Optional Decorations:
- Add buttons, sequins, or other embellishments to personalize your stocking.
- Hang and Enjoy:
- Hang your DIY Christmas stocking by the fireplace or on a mantel and enjoy the festive spirit!
Feel free to get creative with different fabrics, colors, and decorations to make a stocking that suits your holiday style. Happy crafting!
5. Christmas Ornaments Ideas

Turn your tree into a masterpiece with budget-friendly ornaments. Think outside the box—grab some old holiday cards and cut out festive shapes. String them up with colorful ribbon, and you’ve got unique and sentimental ornaments.
Making your own DIY Christmas ornaments is a wonderful way to add a personal touch to your holiday decorations. Here’s a simple guide to creating homemade ornaments:
Salt Dough Ornaments:
Materials:
- 2 cups all-purpose flour
- 1 cup salt
- 1 cup water
- Rolling pin
- Cookie cutters
- Acrylic paint
- Paintbrush
- Ribbon or string for hanging
- Clear sealer (optional)
Instructions:
- Make the Salt Dough:
- In a bowl, mix the flour, salt, and water until you form a smooth dough.
- Roll and Cut Shapes:
- Roll out the dough on a floured surface.
- Use cookie cutters to cut out festive shapes (trees, stars, bells, etc.).
- Make a Hole for Hanging:
- Use a straw or the end of a paintbrush to create a hole near the top of each ornament for hanging.
- Bake:
- Place the ornaments on a baking sheet and bake at a low temperature (around 200°F or 90°C) for 2-3 hours or until they are completely hardened.
- Paint:
- Once the ornaments are cool, paint them with acrylic paint. Get creative with colors and designs.
- Seal (Optional):
- If you want extra protection, you can seal the ornaments with a clear spray sealer.
- Attach Ribbon:
- Thread a ribbon or string through the hole for hanging.
- Hang and Enjoy:
- Hang your salt dough ornaments on the tree and enjoy your handmade creations!
Cinnamon Stick Ornaments:
Materials:
- Cinnamon sticks
- Craft glue
- Ribbon
- Decorative elements (buttons, beads, etc.)
- Paint (optional)
Instructions:
- Create a Base:
- Arrange cinnamon sticks in the shape of a star or other desired shapes, gluing the ends together.
- Decorate:
- Use craft glue to attach buttons, beads, or other decorative elements to the cinnamon sticks.
- Paint (Optional):
- If you like, you can paint the decorations with acrylic paint.
- Attach Ribbon:
- Attach a ribbon to one of the cinnamon stick points for hanging.
- Hang and Enjoy:
- Hang your cinnamon stick ornaments on the tree or around the house for a festive aroma.
Feel free to experiment with different materials and techniques to create ornaments that match your holiday style. Happy crafting!
6. Faux Presents

Wrapping paper can be pricey, but that doesn’t mean you can’t have beautifully wrapped “presents” under your tree. Utilize brown paper bags or even newspaper, add a festive ribbon, and stack them strategically for a cozy, rustic vibe.
Creating DIY faux presents can be a fun and creative project, and they can be used for various purposes, such as holiday decorations or as part of gift wrapping. Here’s a simple guide to help you make your faux presents:
Materials:
- Cardboard boxes: You can reuse old cardboard boxes or buy plain ones at a craft store.
- Wrapping paper: Choose the festive wrapping paper of your choice.
- Double-sided tape or glue:
- Scissors:
- Ribbon or bows: Optional for additional decoration.
Steps:
- Select Your Boxes:
- Choose the size and shape of the boxes you want to use. You can mix and match sizes for variety.
- Wrap the Boxes:
- Cut the wrapping paper to fit around each box, leaving enough extra paper to cover the sides.
- Use double-sided tape or glue to secure the wrapping paper to the box. If you’re using tape, make sure it’s on the inside of the paper to keep the outside looking neat.
- Fold and Secure the Edges:
- Fold the edges of the wrapping paper neatly and secure them with tape or glue. This will give your faux presents a polished look.
- Repeat for Each Box:
- Wrap all of your cardboard boxes in the same manner. You can use different wrapping papers for a varied and festive appearance.
- Stack the Boxes:
- Arrange the wrapped boxes in a stack or display them in a creative way. You can place them under a tree, on a mantel, or as part of a holiday centerpiece.
- Optional: Add Ribbon or Bows:
- If you want to add extra flair, tie a ribbon around the presents or attach bows to the tops. This step is entirely optional and depends on your personal preference.
- Display and Enjoy:
- Once your faux presents are wrapped and decorated to your liking, display them in your home. They can add a festive touch to any space.
Remember to get creative with your wrapping paper and decorations to match the occasion or theme you have in mind. This DIY project is not only enjoyable but also allows you to personalize your decor.
7. Outdoor Christmas Decorations Ideas
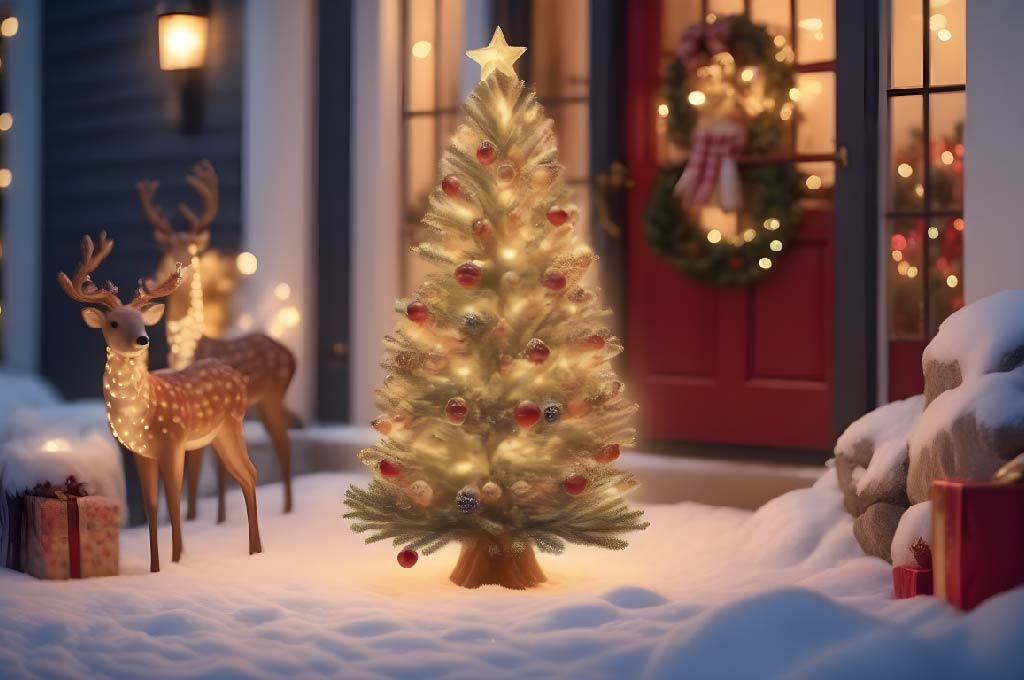
Let’s not forget about the exterior of our homes. Opt for energy-efficient LED string lights to illuminate your porch or yard. Scatter pinecones or beach balls wrapped in lights for a Floridian twist.
Creating DIY outdoor Christmas decorations can add a festive touch to your home and garden. Here are some simple ideas with easy steps for you to try:
1. DIY Tomato Cage Christmas Tree:
Materials:
- Tomato cages
- Greenery or garland
- Outdoor lights
- Ornaments and decorations
Steps:
- Turn a tomato cage upside down to create a cone shape.
- Wrap the cage with greenery or garland, securing it with zip ties or floral wire.
- Add outdoor lights by wrapping them around the tree.
- Decorate with weather-resistant ornaments and other festive items.
- Place the tree on your porch or in your garden.
2. Luminous Snowball Lights:
Materials:
- String lights
- White ping pong balls or clear plastic cups
Steps:
- Poke a hole in the bottom of each ping pong ball or cup.
- Push a string light bulb through each hole.
- Arrange the balls or cups on the string lights evenly.
- Hang the lights in your outdoor space for a magical, glowing effect.
3. Wooden Pallet Christmas Tree:
Materials:
- Wooden pallet
- Green spray paint
- Outdoor lights
- Ornaments
Steps:
- Spray paint the wooden pallet with green paint.
- Let it dry completely.
- Attach outdoor lights to the pallet in the shape of a Christmas tree.
- Decorate with weather-resistant ornaments.
- Place the pallet against a wall or hang it for a rustic outdoor decoration.
4. Giant Ornaments:
Materials:
- Large plastic balls or inflatable beach balls
- Outdoor paint (festive colors)
- String or ribbon
Steps:
- Paint the plastic balls with outdoor paint in festive colors.
- Let them dry completely.
- Attach a string or ribbon to each ornament for hanging.
- Hang the giant ornaments from trees or porch ceilings.
5. Frozen Water Balloon Luminaries:
Materials:
- Water balloons
- Water
- Food coloring (optional)
- String lights
Steps:
- Fill water balloons with water (add food coloring for a festive touch).
- Freeze the water balloons overnight.
- Once frozen, remove the balloons.
- Place string lights inside the ice globes.
- Arrange them in your outdoor space for a magical, frozen effect.
Remember to consider the weather conditions in your area and use materials that are suitable for outdoor use. These DIY outdoor Christmas decorations are customizable, so feel free to get creative and add your personal touch to each idea.
8. Christmas Table Setting Ideas

Bring the holiday spirit to your dining table without splurging. Use natural elements like holly or citrus fruits as centerpieces. Mix and match your tableware for an eclectic, yet charming, look.
Creating a festive Christmas table setting can enhance the holiday atmosphere for your celebrations. Here are some simple and creative DIY Christmas table setting ideas with easy steps:
1. Candlelit Centerpiece:
Materials:
- Various sizes of pillar candles
- Greenery or pinecones
- Small ornaments
- Charger plates (optional)
Steps:
- Arrange pillar candles of different heights in the center of the table.
- Place greenery, pinecones, and small ornaments around the candles.
- For added elegance, set the entire arrangement on charger plates.
2. Personalized Place Cards:
Materials:
- Cardstock or pre-made place cards
- Miniature ornaments or small decorative items
- Ribbon or twine
Steps:
- Write or print the names of your guests on the place cards.
- Attach miniature ornaments or decorative items to the cards.
- Tie a ribbon or twine around each card and place it on the dinner plates.
3. Cranberry and Greenery Runner:
Materials:
- Fresh or faux cranberry garland
- Pine branches or other greenery
- Tea light candles or fairy lights
Steps:
- Lay the cranberry garland down the center of the table.
- Intertwine pine branches or greenery with the cranberries.
- Add tea light candles or fairy lights for a warm and inviting glow.
4. Napkin Ring Wreaths:
Materials:
- Miniature wreaths (store-bought or handmade)
- Ribbon or twine
- Cloth napkins
Steps:
- Place a miniature wreath around each folded napkin.
- Tie a ribbon or twine around the wreath to secure it in place.
- Arrange the napkin and wreath on each dinner plate.
5. DIY Snow Globe Place Settings:
Materials:
- Small glass jars or containers
- Miniature holiday figurines
- Artificial snow or glitter
- Ribbon or twine
- Name tags
Steps:
- Fill each jar with artificial snow or glitter.
- Place a miniature holiday figurine inside each jar.
- Tie a ribbon or twine around the lid and attach a name tag.
6. Edible Centerpiece:
Materials:
- Tiered cake stand
- Seasonal fruits, nuts, or candies
- Sprigs of rosemary or mint for garnish
Steps:
- Arrange seasonal fruits, nuts, or candies on a tiered cake stand.
- Add sprigs of rosemary or mint for a festive touch.
- Place the edible centerpiece in the middle of the table.
Feel free to mix and match these ideas or add your own personal touches to create a Christmas table setting that suits your style. The key is to incorporate festive colors, textures, and elements that bring warmth to your holiday table.
9. Green Christmas Ornaments

Embrace the greenery of Florida by incorporating it into your ornaments. Attach small sprigs of palm leaves or even citrus slices to add a touch of the tropics to your tree.
Creating your DIY green Christmas ornaments can add a personalized and eco-friendly touch to your holiday decor. Here are a few simple ideas with easy steps:
1. Pinecone Ornaments:
Materials:
- Pinecones
- Green acrylic paint
- Paintbrush
- Ribbon or twine
Steps:
- Collect or purchase pinecones.
- Paint the pinecones with green acrylic paint.
- Allow the paint to dry completely.
- Tie a ribbon or twine around the top of each pinecone for hanging.
2. Felt Christmas Trees:
Materials:
- Green felt sheets
- Scissors
- Craft glue
- Assorted embellishments (buttons, sequins, beads)
Steps:
- Cut out Christmas tree shapes from green felt sheets.
- Decorate the trees with craft glue and assorted embellishments.
- Allow the glue to dry.
- Attach a loop of ribbon or twine to the top for hanging.
3. Upcycled Sweater Ornaments:
Materials:
- Old green sweaters
- Ornament forms or Styrofoam balls
- Craft glue
- Twine or ribbon
Steps:
- Cut the green sweater into small squares or rectangles.
- Wrap the sweater pieces around the ornament forms, securing them with craft glue.
- Allow the glue to dry.
- Attach a loop of twine or ribbon for hanging.
4. Paper Geometric Ornaments:
Materials:
- Green cardstock or construction paper
- Scissors
- Craft glue
- String or ribbon
Steps:
- Cut the cardstock or construction paper into strips.
- Create geometric shapes (like circles, triangles, or squares) by gluing the strips together.
- Allow the glue to dry.
- Attach a string or ribbon for hanging.
5. Salt Dough Ornaments:
Materials:
- 2 cups all-purpose flour
- 1 cup salt
- 1 cup water
- Green food coloring
- Cookie cutters
- Straw for making holes
- Acrylic paint (optional)
- Clear sealant (optional)
Steps:
- Mix flour, salt, and water to form a dough.
- Add green food coloring to achieve the desired color.
- Roll out the dough and use cookie cutters to create ornament shapes.
- Use a straw to make a hole at the top of each ornament.
- Bake according to the dough recipe instructions.
- Once cool, you can paint and seal the ornaments if desired.
- Thread a ribbon or twine through the hole for hanging.
Feel free to customize these ideas with your preferred shades of green, additional decorations, or other creative touches. Making your ornaments is not only a fun activity but also allows you to express your style in your holiday decor.
10. Christmas Pet Gift Ideas

Don’t forget our furry friends during the holidays! Create budget-friendly pet stockings filled with their favorite treats and toys. Consider homemade pet-friendly ornaments to add a personal touch to your tree.
Creating DIY Christmas pet gifts can be a fun way to show your furry friends some love during the holiday season. Here are a few simple and pet-friendly ideas with easy steps:
1. Homemade Dog Treats:
Ingredients:
- 2 1/2 cups whole wheat flour
- 1 egg
- 1 cup pumpkin puree (unsweetened)
- 1/2 cup peanut butter
Steps:
- Preheat your oven to 350°F (175°C).
- Mix all ingredients to form a dough.
- Roll out the dough and use cookie cutters to create fun shapes.
- Place the shapes on a baking sheet.
- Bake for 15-20 minutes or until the treats are firm.
- Allow them to cool before letting your dog enjoy them.
2. DIY Catnip Toys:
Materials:
- Fabric scraps
- Catnip
- Sewing needle and thread
Steps:
- Cut two identical shapes from the fabric (like fish, mice, or hearts).
- Sew the shapes together, leaving a small opening.
- Fill the shape with catnip.
- Finish sewing the opening, ensuring it’s secure.
- Present the catnip toy to your feline friend.
3. Pet Bandana:
Materials:
- Fabric in a festive pattern
- Scissors
- Fabric glue or sewing machine
- Velcro strips
Steps:
- Cut a triangle from the fabric, ensuring it’s large enough to tie around your pet’s neck comfortably.
- Hem the edges using fabric glue or a sewing machine.
- Attach Velcro strips to the ends for easy closure.
- Let your pet strut their festive bandana style.
4. Pet Paw Print Ornament:
Materials:
- Salt dough (2 cups all-purpose flour, 1 cup salt, 1 cup water)
- Pet-friendly paint
- Ribbon or twine
Steps:
- Mix flour, salt, and water to form a dough.
- Roll out the dough and press your pet’s paw into it.
- Use a straw to make a hole at the top for hanging.
- Bake according to the dough recipe instructions.
- Once cool, paint the paw print and add your pet’s name.
- Thread a ribbon or twine through the hole for hanging.
5. Pet Blanket:
Materials:
- Fleece fabric
- Scissors
Steps:
- Cut the fleece fabric into a square or rectangle, depending on your pet’s size.
- Optionally, you can add fringes around the edges for a decorative touch.
- Present the cozy blanket to your pet for warmth and comfort.
Remember to consider your pet’s preferences and any dietary restrictions when making treats or toys. These DIY Christmas pet gifts are sure to bring joy to your furry friends during the holiday season.
Decorating for Christmas in Florida doesn’t have to break the bank. Embrace the tropical vibes, get creative with your DIY projects, and enjoy a festive season that’s as budget-friendly as it is beautiful. Here’s to a Sunshine State Christmas filled with joy, warmth, and a touch of DIY magic! 🎅🌴